Intro
In this guide I will show how to setup my Hasty Paste app, which is a fast, minimal pastebin app. In this guide I will be installing it using Docker, however it does support a non Docker install, which is documented in the project docs.
If you don’t know what a pastebin is it’s a place where users can store plain text (sometimes binaries) for sharing with other users, these “pastes” tend to be short lived and have an easily viewable unique link. An example use for a pastebin is sharing a system log with a support team.
To start off, what is Hasty Paste? Well it’s a open source, fast and minimal pastebin.
Despite being minimal, it does not lack features; here are some of them:
- Add expiring pastes
- Syntax highlighting
- No JavaScript needed
- REST API
- No Database needed
- Caching
Unlike a lot of open source paste bins; it features a custom flat-file system, this means it does not use a SQL database. This has the benefit of not requiring a SQL database server and allowing for the possibility of being faster and more optimised for the use case.
In the recent update (1.7) multi-tiered caching was added, this allows the handling of a much higher amount of concurrent users and could open the possibility for small businesses to deploy it for a private pastebin service.
Hasty Paste features customisable “branding”
Install
As stated in the intro I will be installing Hasty Paste using Docker, this is most likely the simplest way as well.
First make an env file to store the environment variables, this reduces the size of the Docker run command:
Hasty Paste can be customised more, take a look in the docs
|
|
Then we can run it.
|
|
After the image downloads and the container starts, we should have the server running in a detached state. Think of it as running in the background. If you want to shut the server down for some reason you can use:
|
|
For easier management, you may want to use Docker Compose
Usage
Now that the server is running, you can navigate to the site in browser. Once there you should be met with the Hasty Paste about page.
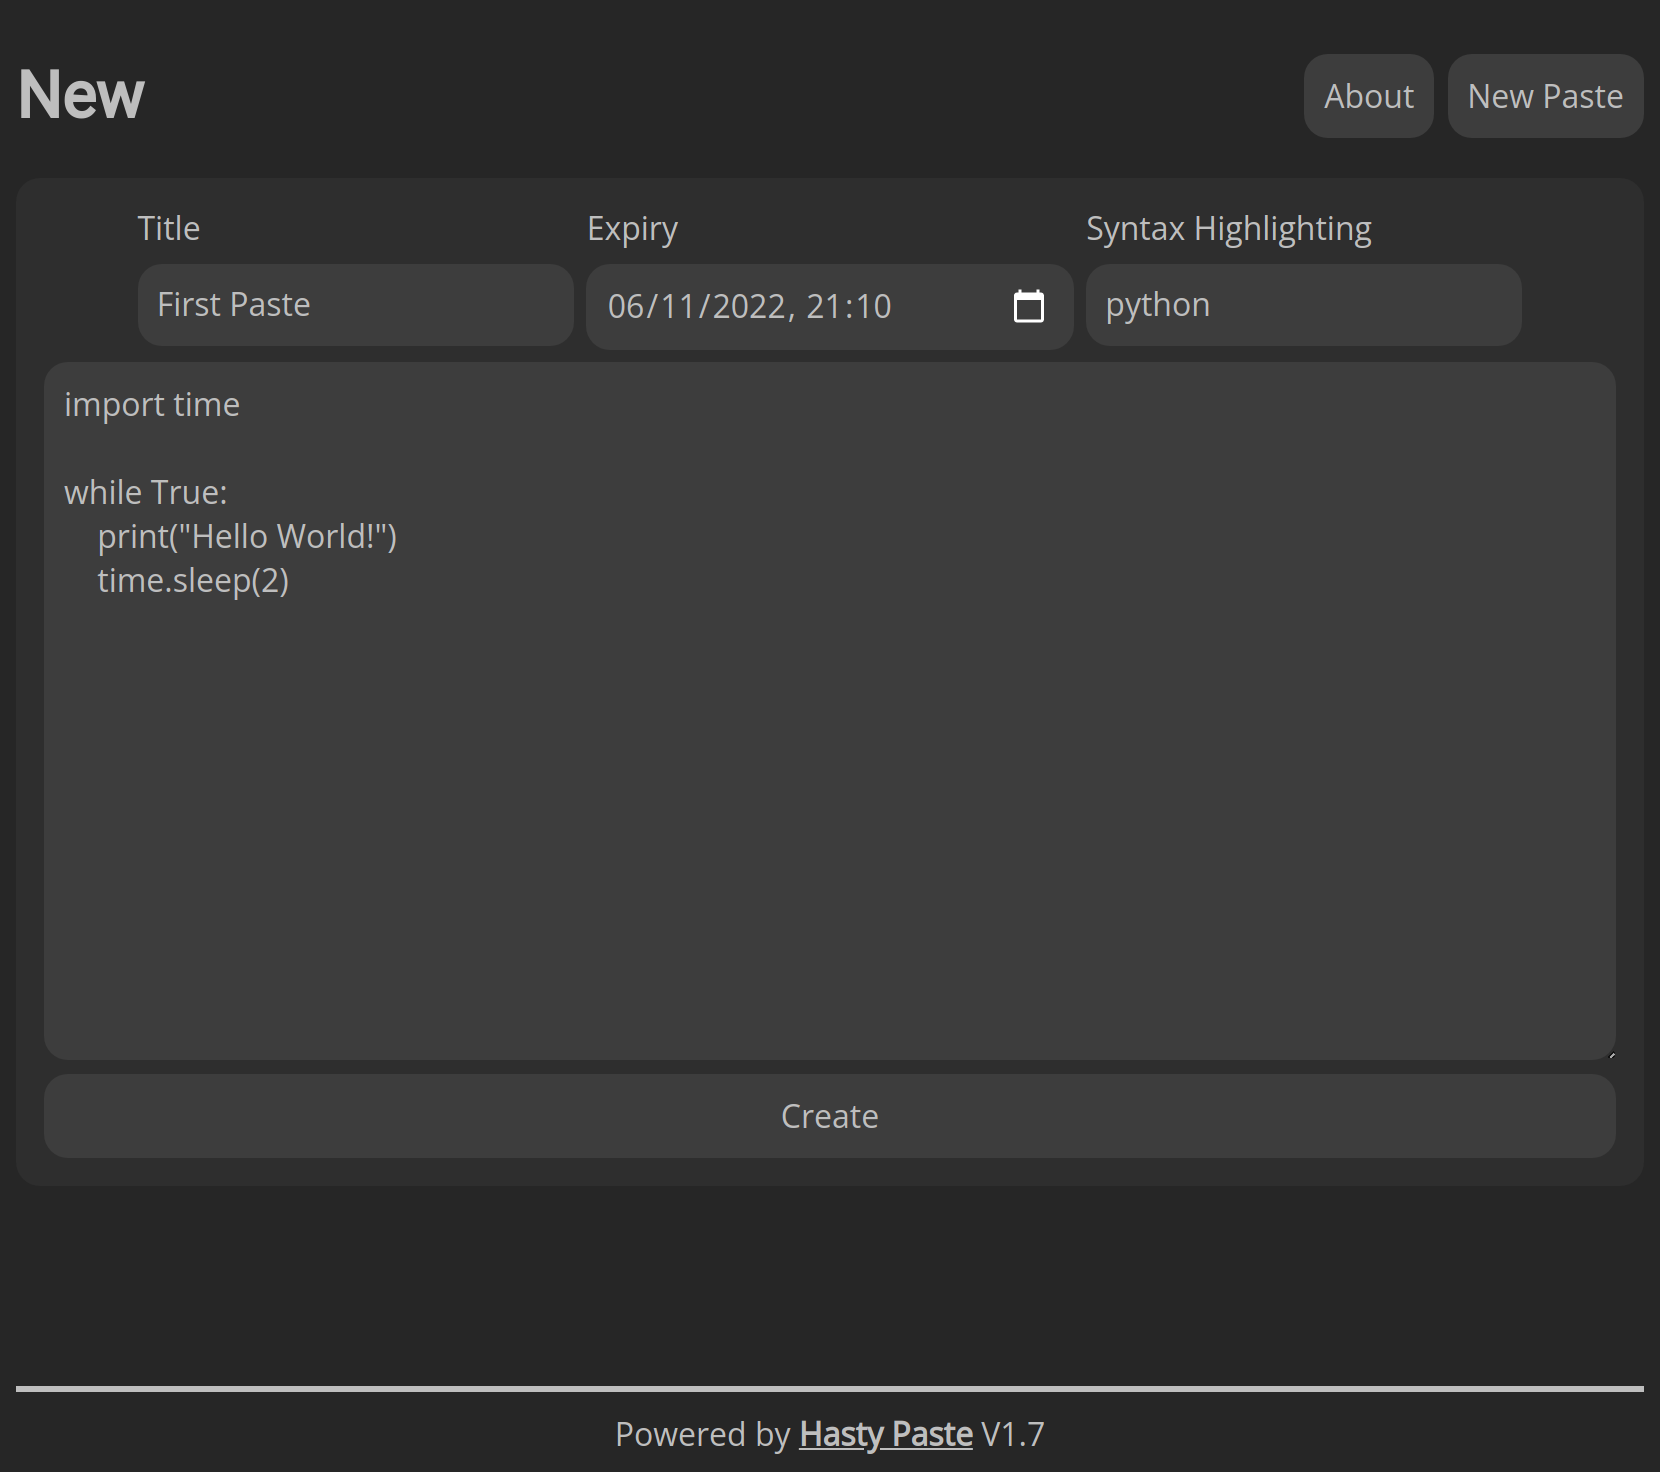
Now we can add our first paste, by clicking on the “New Paste” button we get taken to the paste creation screen. From here we can add a title, add an expiry, select a syntax for highlighting and of course add add the paste content. Try pasting the content below, and selecting Python:
|
|
Here is what it looks like in the edit screen:
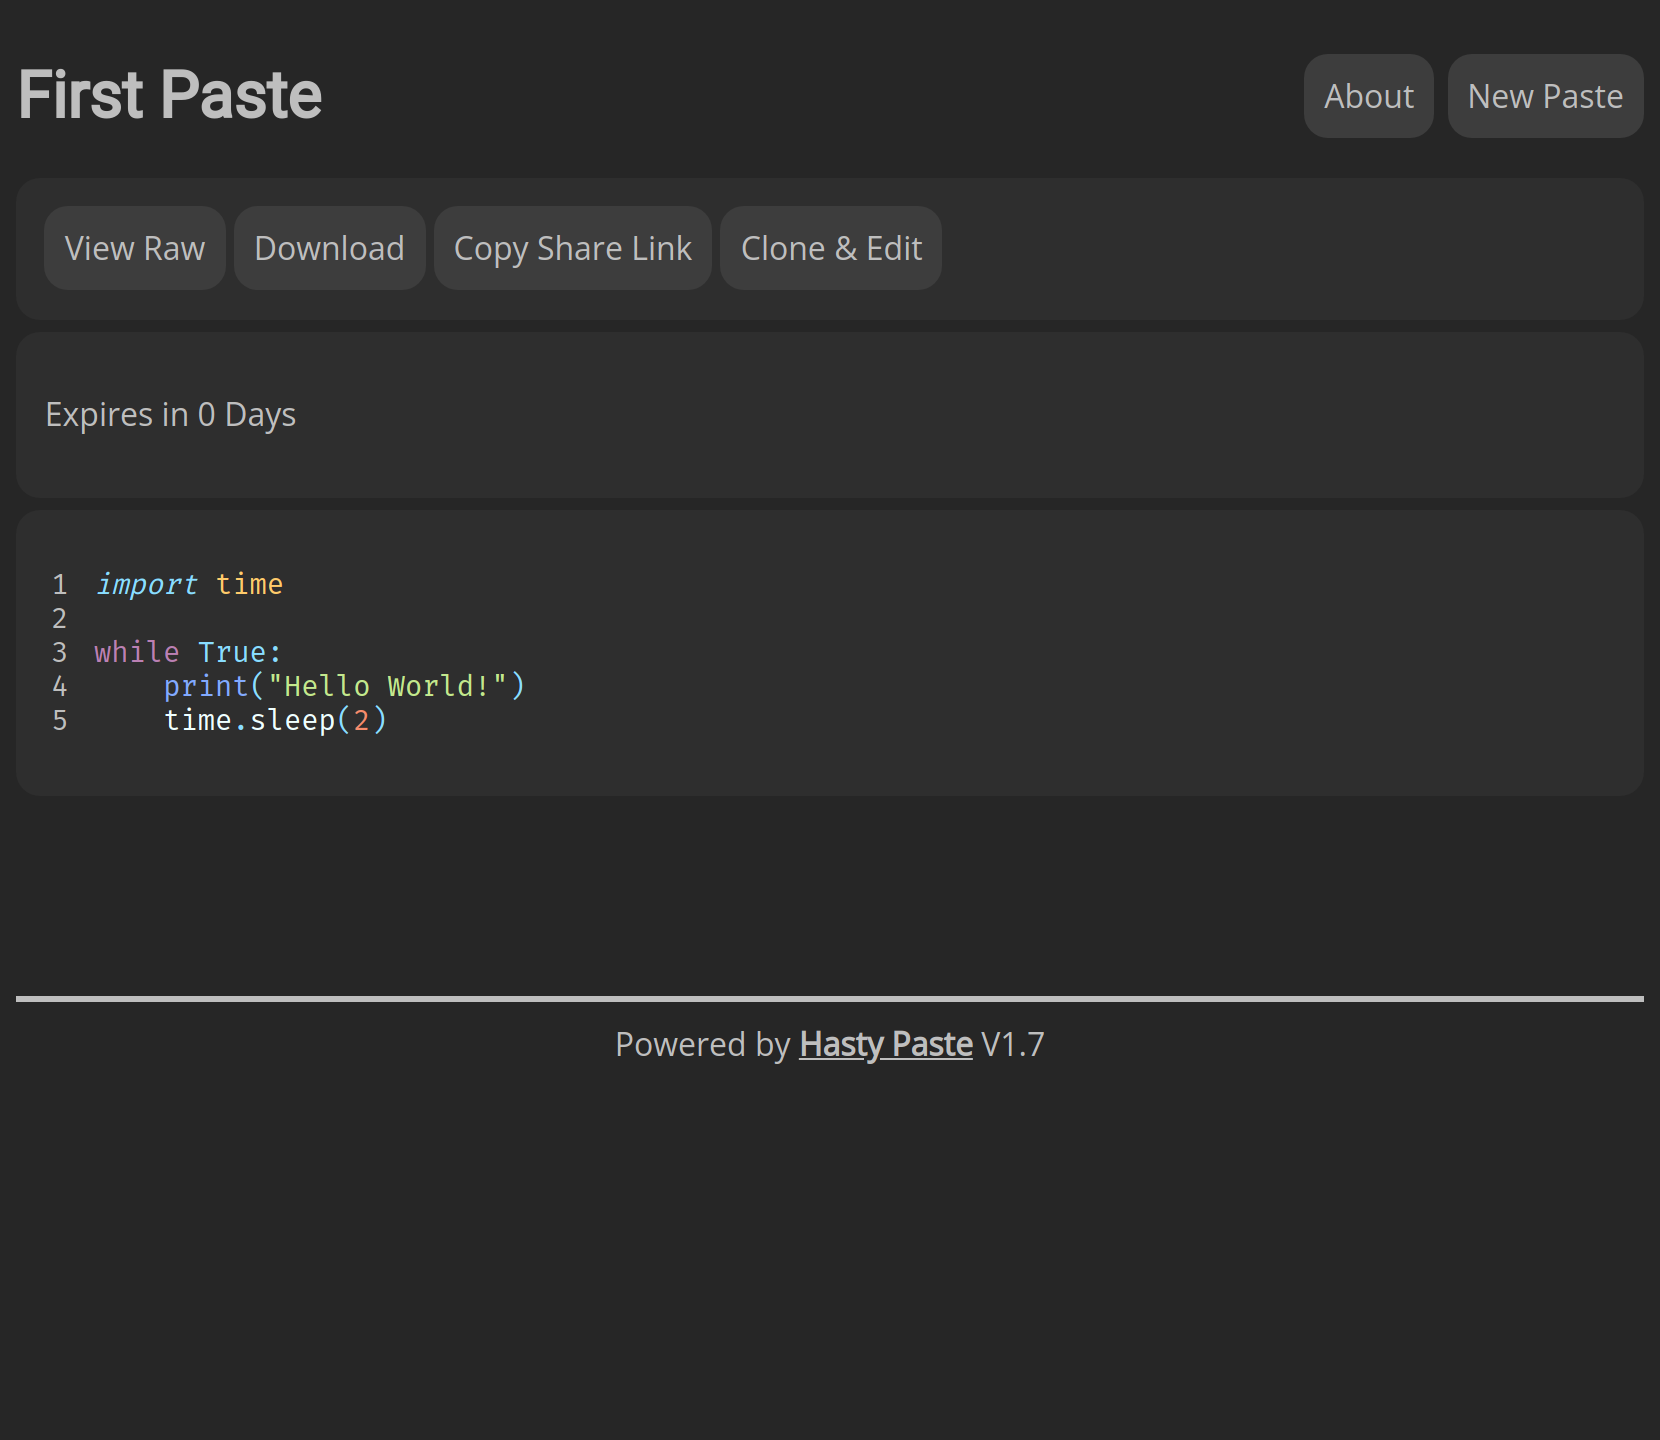
And this is what happens when we have created it:
Although you can’t see it in the previous screenshots, the url has the paste id which was in my case:
|
|
We can now either copy the url or click the “Copy Share Link” button and give it to someone else. Downloading the paste will just download the raw content.
As you might have noticed there is no way of modifying and existing paste without changing the url, so what happens if you forget to select a syntax language (or selected the wrong one). Well don’t worry because you can simply add the language as an extension to the url for example:
|
|
Usage Outside Of Web UI
As Hasty Paste features a REST API, we can use it without using the web UI. There is an official program which allows quick creation of pastes called “hastily paste it” which is available in the same repository.
We can also use curl with the simple paste api:
|
|
Conclusion
Hope you found this useful, maybe you now have it deployed. If you have any questions or ideas about Hasty Paste; feel free to post them in the projects discussions page or on the “Enchanted People” community server.
Disclaimer: I am the creator of 'Hasty Paste'.
